
Spa Day at Home Guide
Creating a Home Spa Experience: Products, Rituals & Atmosphere
A spa day at home guide doesn’t start with products — it starts with permission. Permission to close the door, silence the phone, and spend two hours doing nothing productive except caring for yourself. I’ve been building home spa rituals since long before self-care became a hashtag, and the difference between a good home spa day and a great one has almost nothing to do with how much you spend. It has everything to do with intention, sequence, and atmosphere.
The global spa industry generates over $120 billion annually, and a meaningful portion of that growth now comes from at-home products designed to replicate the professional experience. But here’s what those marketing campaigns won’t tell you: the most transformative element of a spa day at home guide isn’t the product lineup. It’s the ritual. The sequence. The deliberate pacing that tells your nervous system it’s safe to stand down from high alert.
Professional spas understand this intuitively. Walk into any well-designed spa and the experience begins before anyone touches your skin. The lighting shifts. The temperature adjusts. The ambient sound changes. These environmental cues prime your body for relaxation before a single treatment begins. Replicating those cues at home — not the marble floors or heated stone beds, but the sensory transitions — is what separates a forgettable bath from a genuinely restorative experience.
Setting the Atmosphere: Your Foundation
Atmosphere accounts for roughly seventy percent of the spa experience, yet most spa day at home guide articles skip past it in two sentences. Lighting, sound, scent, and temperature work together to create an environment that signals rest to your brain. Get these four elements right and even basic products will feel luxurious. Get them wrong and expensive products will feel rushed.
Lighting: The First Signal
Bright overhead lighting is the enemy of relaxation. Your brain associates bright, blue-toned light with daytime alertness — it suppresses melatonin production and keeps your sympathetic nervous system engaged. The fix is simple: switch to warm, low light sources. Candles are the obvious choice and they work. Battery-operated LED candles have improved dramatically and eliminate the fire concern for bathrooms. Dimmer switches, if available, should be set to about thirty percent of maximum.
Natural light through a frosted or curtained window creates the ideal spa atmosphere during daytime sessions. The light is diffused, warm, and shifts naturally over the course of your spa time — a subtle environmental change that your body registers even if your conscious mind doesn’t.
Sound: What You Hear Matters More Than You Think
Silence isn’t necessarily what you want. Complete silence can feel uncomfortable — your brain starts scanning for threats when the sound floor drops too low. What works is consistent, low-frequency ambient sound: rainfall, ocean waves, or specifically composed spa music that avoids melody and rhythm (melody engages your analytical brain; rhythm creates expectation). Apps like Calm, Insight Timer, and myNoise offer excellent ambient soundscapes designed for this purpose.
Ritual note: Start your ambient sound ten minutes before you begin any physical routine. This gives your auditory system time to acclimate and signals the transition from “regular day” to “intentional rest.” The same principle applies to scent — light your candles or start your diffuser before you undress. Let the environment settle before you enter it.
Scent: Your Strongest Memory Trigger
Aromatherapy isn’t mystical — it’s neurological. Your olfactory bulb connects directly to the amygdala and hippocampus, the brain regions responsible for emotion and memory. This is why a particular scent can instantly transport you to a specific moment in your past. A well-chosen spa scent creates a Pavlovian association: after several sessions, simply smelling that scent will begin to trigger relaxation before you’ve done anything else.
Lavender is the most studied essential oil for relaxation. Research published in the Journal of Alternative and Complementary Medicine found that inhaling lavender essential oil reduced anxiety scores and improved sleep quality across multiple controlled trials. Eucalyptus opens nasal passages and creates a “clean” sensory experience. Bergamot reduces cortisol levels measurably. Rose geranium balances mood without sedating. These aren’t just pleasant smells — they produce measurable physiological changes.
| Essential Oil | Primary Benefit | Best Used For | Avoid If… |
|---|---|---|---|
| Lavender | Anxiety reduction, sleep support | Evening spa sessions, bath soaks | You need to stay alert afterward |
| Eucalyptus | Respiratory opening, mental clarity | Steam treatments, morning sessions | Skin is highly sensitive (use diluted) |
| Bergamot | Cortisol reduction, mood lift | Massage oils, diffusion | Applying before sun exposure (photosensitive) |
| Rose Geranium | Hormonal balance, skin repair | Face treatments, body oils | Pregnant (consult professional first) |
| Peppermint | Headache relief, invigoration | Foot soaks, scalp treatments | Using near eyes or on sensitive skin |
| Ylang Ylang | Blood pressure reduction, calm | Bath soaks, body massage | You dislike strong floral scents |
The Product Lineup: What You Actually Need
A spa day at home guide that requires thirty products is a shopping list, not a ritual. You need five categories covered — cleanser, exfoliant, mask, moisturizer, and soak. Within each category, one well-chosen product outperforms five mediocre ones. Here’s what matters in each category and where spending more actually translates to better results.
Body Scrub: Your Exfoliation Foundation
Exfoliation removes dead skin cells that accumulate over roughly twenty-eight-day cycles. Without exfoliation, moisturizers sit on top of dead tissue rather than penetrating living skin. Salt scrubs provide more aggressive exfoliation and are ideal for rough areas — feet, elbows, knees. Sugar scrubs are gentler, dissolve more readily in water, and suit sensitive skin. Coffee scrubs temporarily improve skin appearance through caffeine-induced vasoconstriction (the caffeine tightens blood vessels, reducing puffiness).
Make your own body scrub: mix one cup of dead sea salt with half a cup of coconut oil and ten drops of your chosen essential oil. This produces a scrub that rivals products costing forty to sixty dollars, using ingredients that total under eight dollars. The coconut oil melts at skin temperature, releasing the essential oils gradually and leaving a light moisture barrier after rinsing.
Tip: Always exfoliate before masking, never after. Exfoliation opens pores and removes the barrier layer that prevents mask ingredients from absorbing. Masking after exfoliation delivers active ingredients directly to fresh skin. Masking before exfoliation wastes the mask’s benefits — you’d just scrub them off. This sequencing error is the single most common mistake in home spa routines.
Face Masks: Targeted Treatment
Clay masks (kaolin, bentonite, French green) draw out impurities and excess oil. They’re ideal for oily or combination skin and should be applied in a thin, even layer — thick application doesn’t increase effectiveness, it just wastes product and takes longer to dry. Sheet masks deliver concentrated serum to the skin under an occlusive barrier that prevents evaporation. Overnight sleeping masks provide sustained hydration during the body’s natural repair cycle.
The best face mask for a home spa day depends on your skin’s current condition, not your skin type. Even oily skin sometimes needs hydration rather than extraction. If your skin feels tight after cleansing, use a hydrating mask regardless of your typical skin type. If your pores look congested and your complexion seems dull, a clay mask is the right call even if you normally have dry skin. Flexibility beats routine.
The Ritual: A Step-by-Step Home Spa Sequence
Sequence matters in spa treatments just as it matters in cooking — the order of operations affects the final result. This spa day at home guide follows the principle used in professional settings: cleanse first, treat second, protect last. Each step prepares the skin for the next. Skipping steps or reordering them reduces the effectiveness of everything that follows.
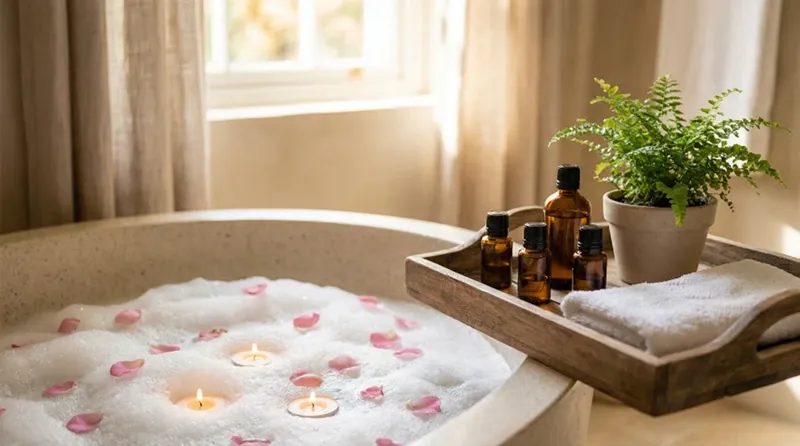
1Warm Soak (20-30 minutes): Fill your tub with water between 37-39°C (98-102°F). Hotter isn’t better — water above 40°C can cause dizziness and actually stresses your cardiovascular system. Add bath salts (Epsom salt delivers magnesium through the skin, which supports muscle relaxation) or a bath oil. This is your transition phase. Let the warm water do its work on your muscles and your mind. Keep a glass of cool water nearby — warm baths cause fluid loss through sweating.
2Body Exfoliation (10 minutes): After your soak, when skin is soft and pores are open, apply your body scrub in circular motions. Start at your feet and work upward — this follows lymphatic flow direction and supports natural drainage. Pay extra attention to rough areas but use lighter pressure on the chest and inner arms where skin is thinner. Rinse thoroughly.
3Face Cleanse + Mask (15-20 minutes): Double-cleanse your face — oil-based cleanser first to dissolve sunscreen and sebum, then a water-based cleanser to remove remaining impurities. Apply your chosen face mask. While the mask sets, this is your stillness window. Lie down with a cool towel over your eyes. Breathe slowly. Don’t check your phone. This enforced pause is where genuine mental restoration happens.
4Hair Treatment (during mask time): Apply a deep conditioning mask or warm oil treatment to your hair while your face mask works. Coconut oil, argan oil, or a dedicated hair mask — warm the product between your palms before applying from mid-shaft to ends. Pin your hair up loosely. The warmth from your body and the humidity from the bathroom environment enhance absorption.
5Rinse, Tone, Moisturize (10 minutes): Remove your face mask and hair treatment. Apply toner or facial mist to balance skin pH. Follow with serum (if you use one), then moisturizer, then SPF if you’ll be going outside. For the body, apply a rich body butter or oil while skin is still slightly damp — this locks in moisture far more effectively than applying to dry skin. Finish with hand cream and cuticle oil.
Personal note: The total time above adds up to roughly 75-90 minutes. That’s intentional. A spa day at home doesn’t need to consume your entire day. Ninety focused minutes of genuine self-care is worth more than four hours of half-attentive pampering while answering emails between steps. Protect those ninety minutes completely. Everything else can wait.
Building a Sustainable Practice
A single spa day feels good. A monthly spa ritual changes your baseline. The difference between occasional self-care and a consistent practice is the same as the difference between one gym session and a regular exercise routine — the benefits compound over time. Your skin improves cumulatively with regular exfoliation and masking. Your ability to relax deepens with repeated practice. Even your product selection becomes more refined as you learn what your body actually responds to versus what marketing told you to buy.
| Frequency | Treatment | Why This Timing |
|---|---|---|
| Weekly | Face mask + quick body scrub | Matches skin cell turnover rate; prevents buildup |
| Bi-weekly | Full spa ritual (all 5 steps) | Deep reset without over-exfoliating; sustainable time commitment |
| Monthly | Extended session + hair treatment + foot soak | Addresses seasonal skin changes; deeper repair cycle |
| Seasonally | Product audit + routine adjustment | Skin needs change with humidity, temperature, and UV exposure |
Start small. If a full five-step routine feels overwhelming, begin with just the soak and one treatment — either a body scrub or a face mask. Do that consistently for a month. Once it feels natural and non-negotiable, add the next element. Building habits works better through gradual layering than through ambitious single attempts that collapse under their own weight by week three.
Consider keeping a simple spa journal — just a few notes after each session about what products you used, how your skin felt afterward, and what you’d change next time. After three months, you’ll have a personalized spa day at home guide that reflects your actual preferences and results rather than generic advice. This self-knowledge is the most valuable product in your entire routine.
Visit the blog for seasonal product recommendations and ritual updates. Our services page details professional treatments that complement your home practice, and you can book sessions directly through our appointments page when you’re ready for a guided experience.
Frequently Asked Questions
How much should I spend on products for a home spa day?
You can create an effective home spa setup for $30-50 using basic products — Epsom salts, a homemade sugar scrub, a clay mask powder, coconut oil, and essential oils. Premium products can push the total to $150-300, but the returns diminish sharply above the $100 mark. The biggest quality jump happens between the cheapest options and mid-range products. Going from mid-range to luxury is about experience and preference, not measurably better results.
Can I do a spa day at home without a bathtub?
Absolutely. Replace the soak with a long, warm shower — let the steam build in the bathroom with the door closed. Use a shower-safe eucalyptus bundle hung from the showerhead for aromatherapy. Exfoliate in the shower, then step out for masking and moisturizing steps. A foot soak in a basin provides many of the same relaxation benefits as a full bath. The ritual and atmosphere matter more than the specific equipment.
What’s the ideal water temperature for a bath soak?
Between 37-39°C (98-102°F) — warm enough to relax muscles and open pores, but not hot enough to stress your cardiovascular system. Water above 40°C (104°F) can cause lightheadedness, rapid heart rate, and actually increases cortisol levels — the opposite of what you want. Use a bath thermometer if you’re unsure. The water should feel comfortably warm, not hot enough to make you gasp when you first sit down.
How do I know which essential oils are genuine quality?
Look for oils labeled “100% pure essential oil” with the botanical name listed (e.g., Lavandula angustifolia, not just “lavender”). Genuine essential oils come in dark glass bottles (light degrades them) and are sold by companies that provide GC/MS testing results (gas chromatography/mass spectrometry, which verifies chemical composition). Avoid anything labeled “fragrance oil” or “perfume oil” — these are synthetic and lack the bioactive compounds that produce therapeutic effects.
Is it safe to use essential oils directly on skin?
Never apply undiluted essential oils directly to skin — they’re highly concentrated and can cause burns, irritation, or allergic reactions. Always dilute in a carrier oil (jojoba, sweet almond, coconut) at a ratio of about 2-3 drops of essential oil per teaspoon of carrier oil for body application. For face application, reduce to 1 drop per teaspoon. Tea tree and lavender are sometimes used undiluted on small spots, but dilution is always the safer default approach.
